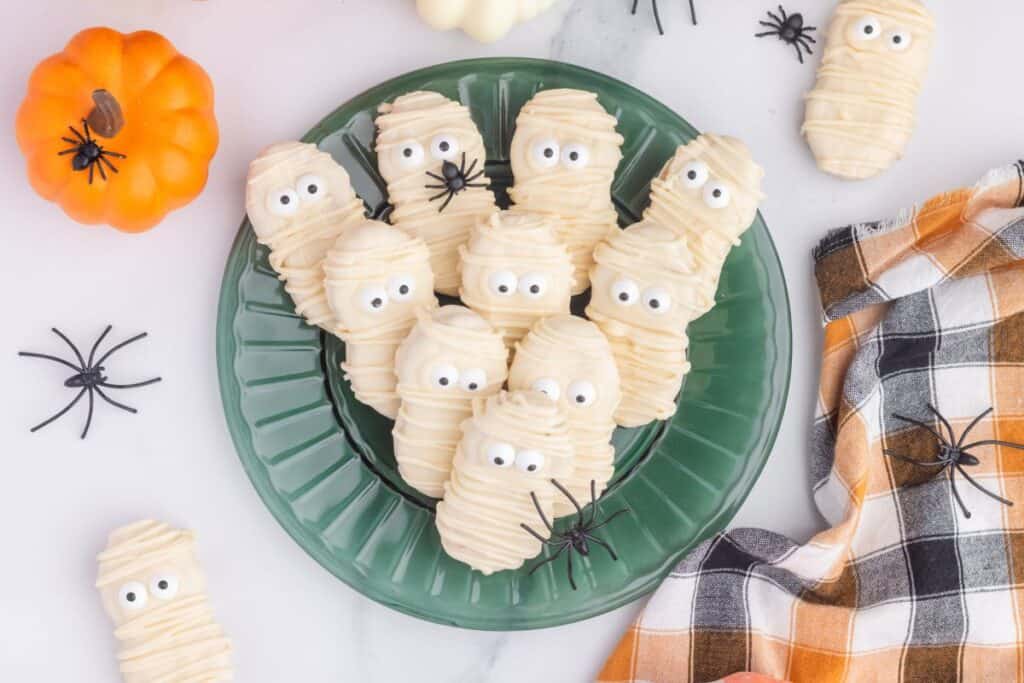
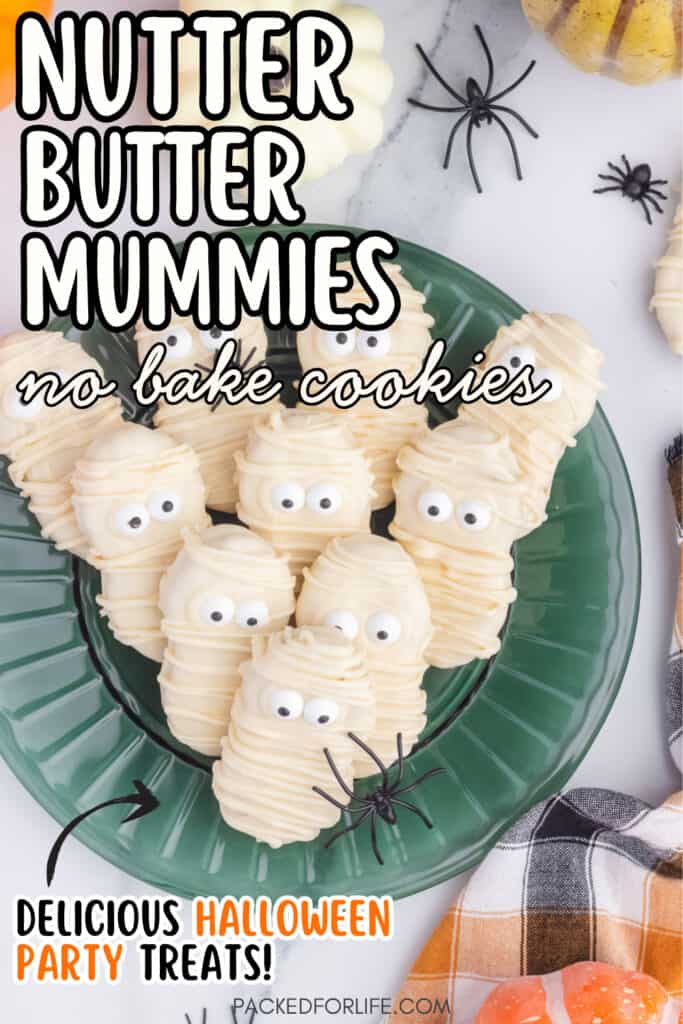
Nutter Butter Mummies Are Creepy Cute No Bake Halloween Treats Anyone Can Make
Packed for Life contains affiliate links. If you make a purchase using one of these links, we may receive compensation at no extra cost to you. As an Amazon Associate, I earn from qualifying purchases. See my Disclosure policy for more info.
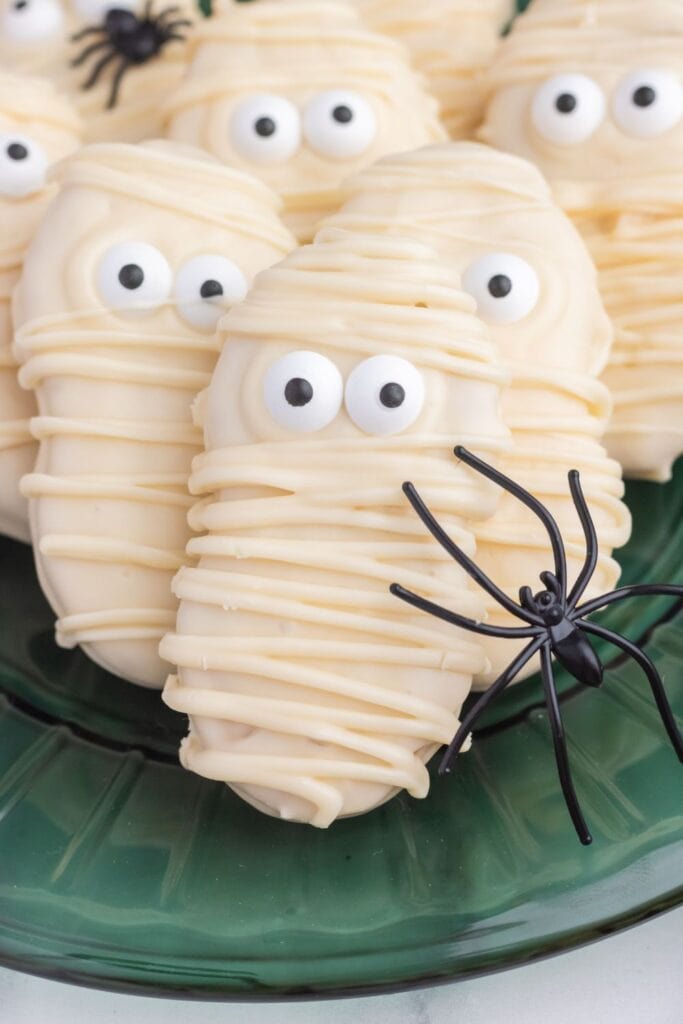
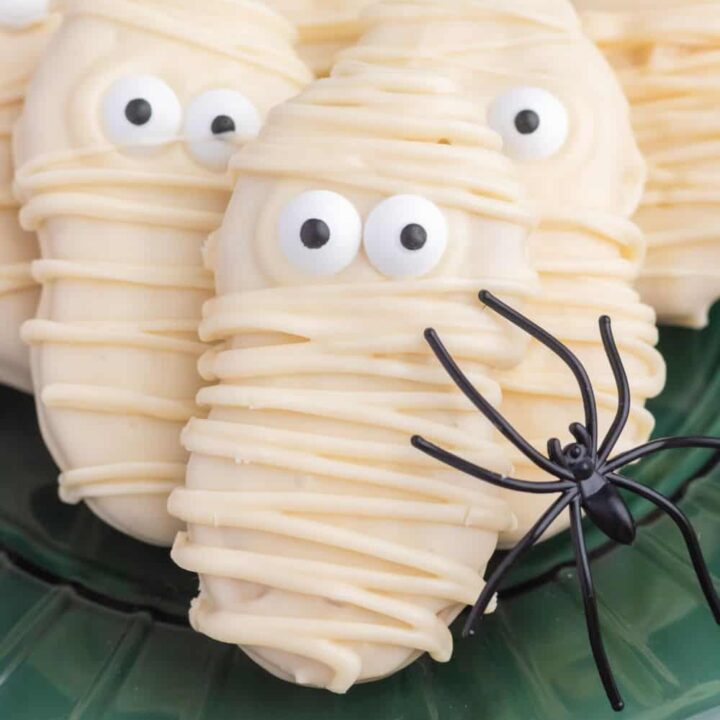
Need a mummy-approved treat that’s fast, festive, and fun? These Mummy Nutter Butter Cookies are one of my go-to easy cute Halloween party treats. Just grab Nutter Butters, white candy melts, and candy eyeballs and you’re good to go. No baking, no fancy tools, just dip, drizzle, and decorate.
Whether you’re throwing together last-minute party snacks or want a fun edible craft to do with the kids, these cheeky little mummies come together in about 20 minutes and are always a hit. With their boo-tifully bandaged look and creepy-cute candy eyes, they’re sweet, silly, and guaranteed to vanish into thin scare.
Not So Scary Mummy Cookies
Nutter Butter Halloween cookies are some of my favorite no-bake treats to make for this ghoulishly fun season.
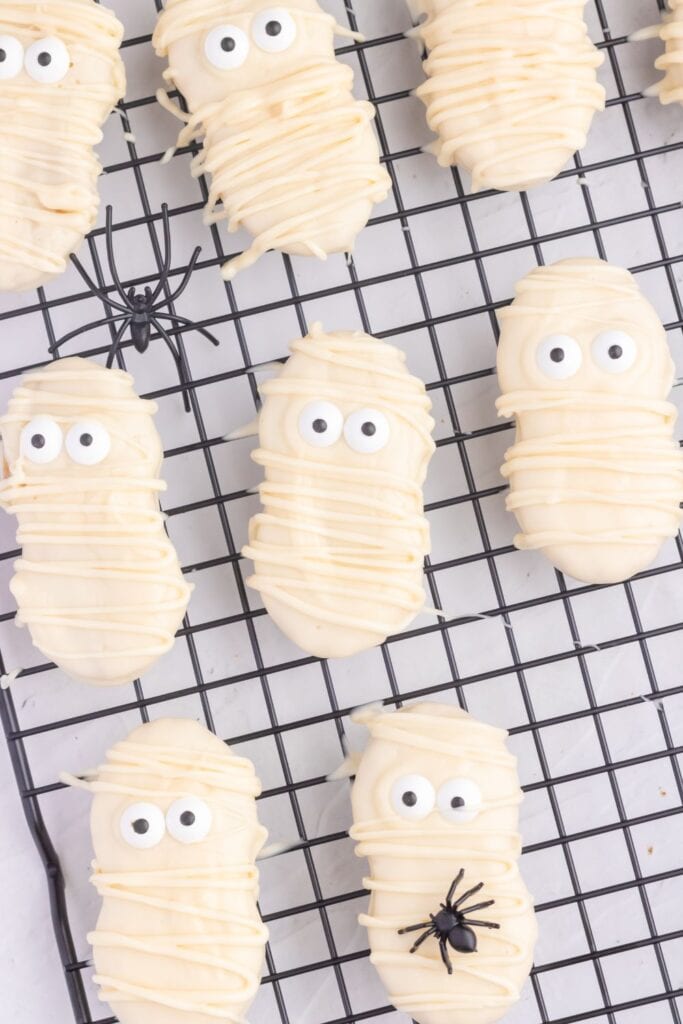
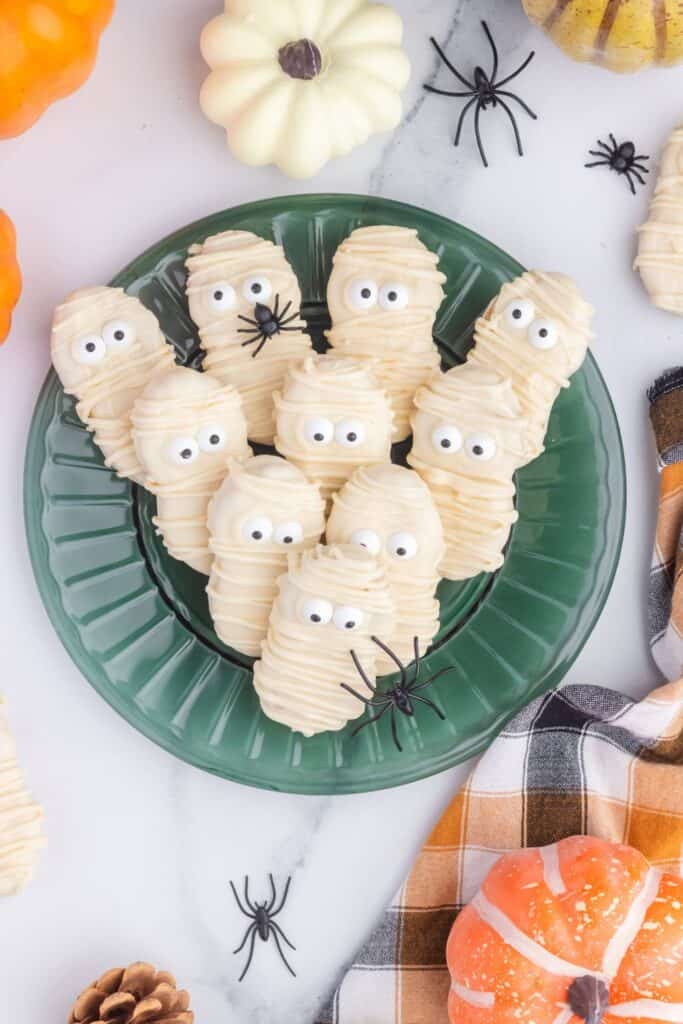
I can’t help but smile every time I make them. Just look how creepy-cute they are. Perfect for a Halloween dessert table, Halloween charcuterie board, or last minute potluck idea.
I have enjoyed making them with my kids as well over the years. They don’t turn out as perfect as the pictures here, but that makes them even more special, as no two are alike. And my kids each have their own style of decorating.
My youngest likes to add extra candy eyes, as she thinks it’s funny.
It is a messy activity (cue picking hardened candy melts out of hair and clothes), so I recommend a good table cloth, and old clothes.
⭐️ Also check out our other favorite Halloween party treats, like our easy oreo spiders & bats treats, these no bake Frankenstein treats, and not so scary pumpkin oreos, and our spooky Graveyard Dirt cups.
Why You’ll Love These Mummy Cookies

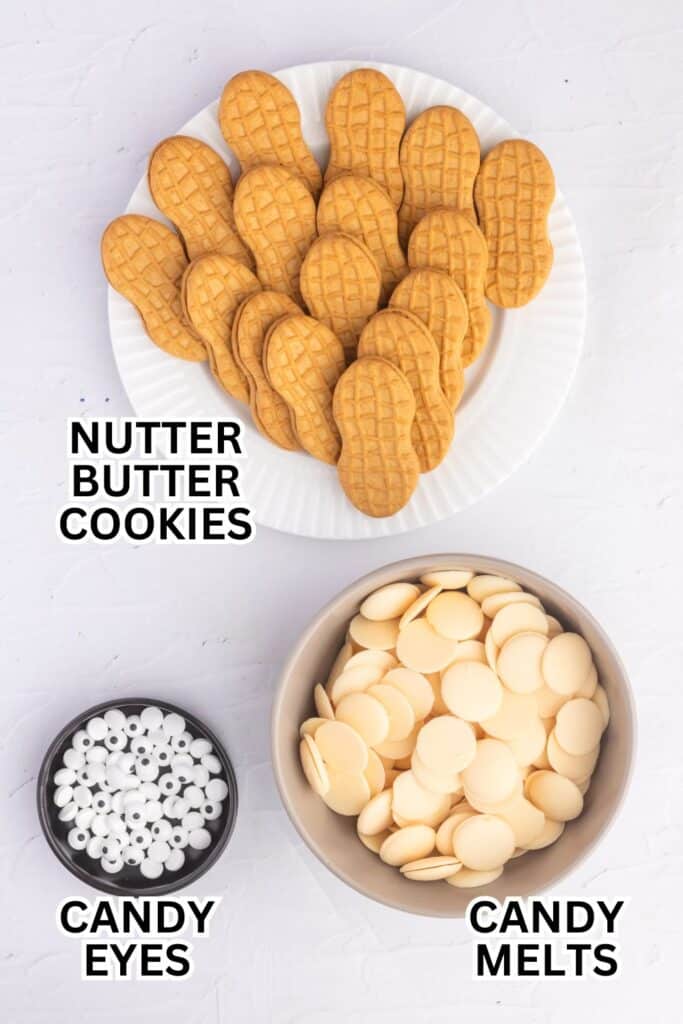
Nutter Butter Mummies Ingredients
Nutter Butter Mummies
- 20 Nutter Butter cookies
- 12–15 oz white candy melts
- 40 candy eyeballs
Halloween Mummy Cookie Tips: You can double or triple the recipe if you need more yummy mummy cookies. Alternatively, you can also use melted white chocolate instead of the candy melts.
Equipment You’ll Need
- Microwave-safe bowl or double boiler (for melting candy melts)
- Spoon or fork (for dipping or drizzling the candy melts)
- Piping bag or small ziploc plastic bag (for mummy drizzle)
- Baking sheet
- Parchment paper or wire cooling rack (to rest cookies on while they set)
- Small tongs or tweezers (optional, for placing candy eyes)
⭐️ Also try these fun pumpkin treats, perfect for Thanksgiving, and Fall parties or these Spooky Halloween party desserts, or some decadent pumpkin spice cinnamon rolls with cream cheese icing.
How to Make Mummy Nutter Butter Cookies
1. Melt the candy melts
In a microwave-safe bowl or double boiler, melt the candy melts according to the instructions on the package. Stir until smooth.
Here are some general guidelines for melting candy melts:
How to Melt Candy Melts in a Double Boiler
- Fill a saucepan with 1–2 inches of water and bring it to a low simmer over medium heat.
- Place a heat-safe bowl (preferably glass or metal) on top of the saucepan, making sure the bottom of the bowl doesn’t touch the water., and the bowl seals in the moisture.
- Add your candy melts to the bowl and stir gently and continuously as they begin to melt.
- Maintain gentle heat by keeping the saucepan on a low simmer. If the water boils too vigorously, turn down the heat. This prevents overheating and ensures a smooth texture.
- Continue stirring until all the candy melts are fully smooth and silky. Usually 5 to 10 minutes depending on the amount.
How to Melt Candy Melts in a Microwave
- Place candy melts in a microwave-safe bowl.
- Heat on 50% power for 30 seconds, then stir.
- Repeat in 15- to 30-second intervals, stirring well each time until smooth.
- Do not overheat. If it starts to clump, add a tiny bit of shortening or coconut oil to smooth it out.
- Use immediately for dipping and drizzling.
Here is a quick YouTube video tutorial I found super helpful on how to melt candy melts in both the microwave and double boiler.
2. Dip the cookies
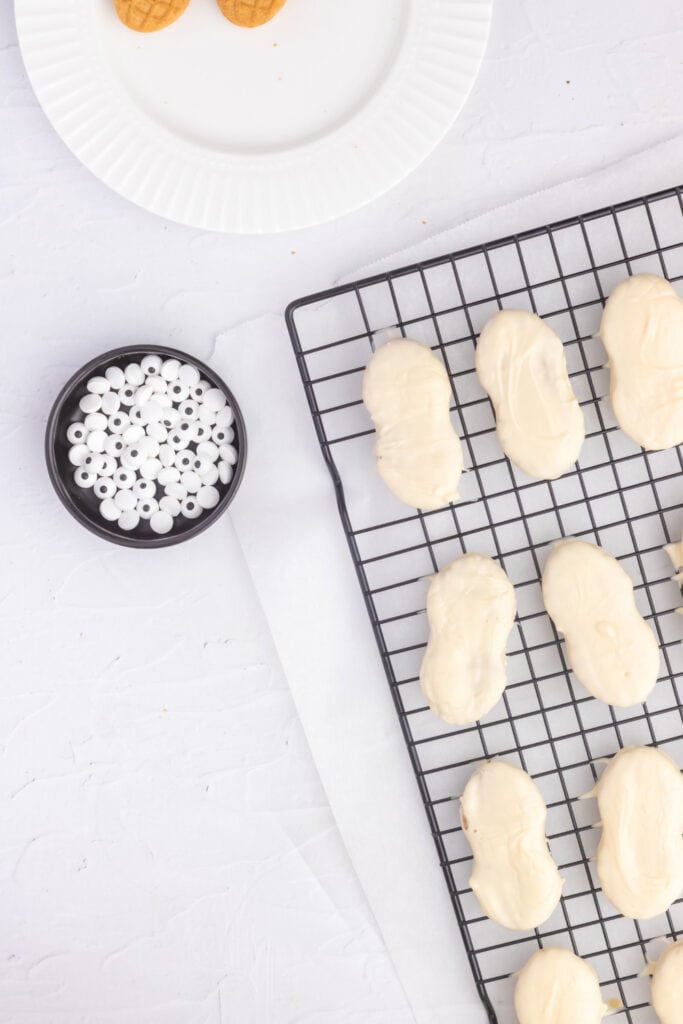
Dip each cookie into the melted candy, gently shaking off the excess. Then place the dipped cookies on a wire rack or parchment-lined baking sheet.
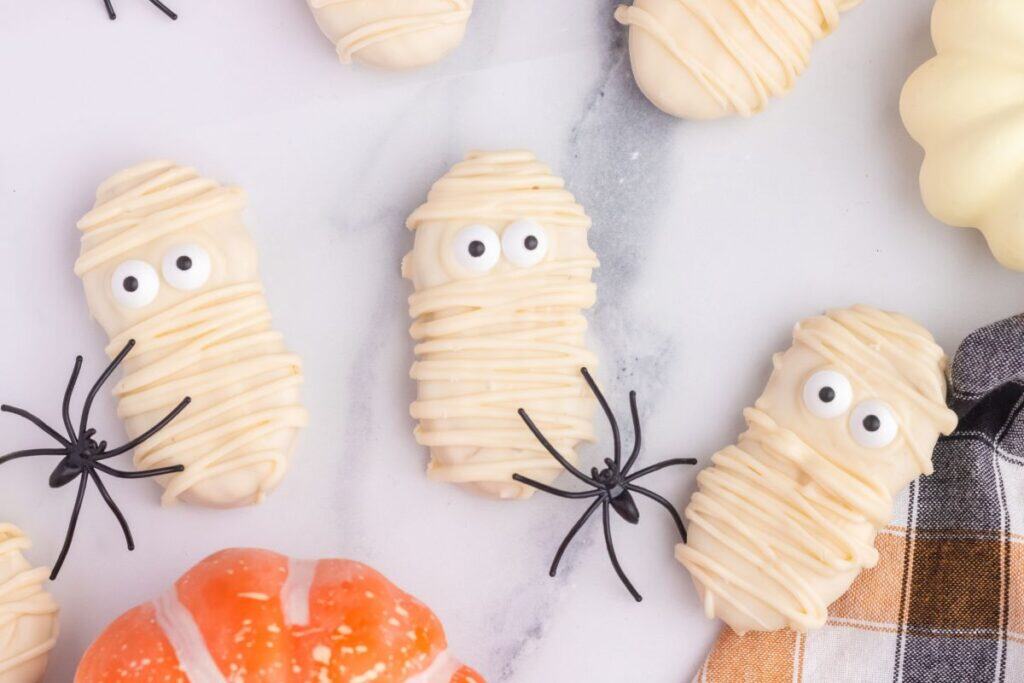
3. Add the eyes
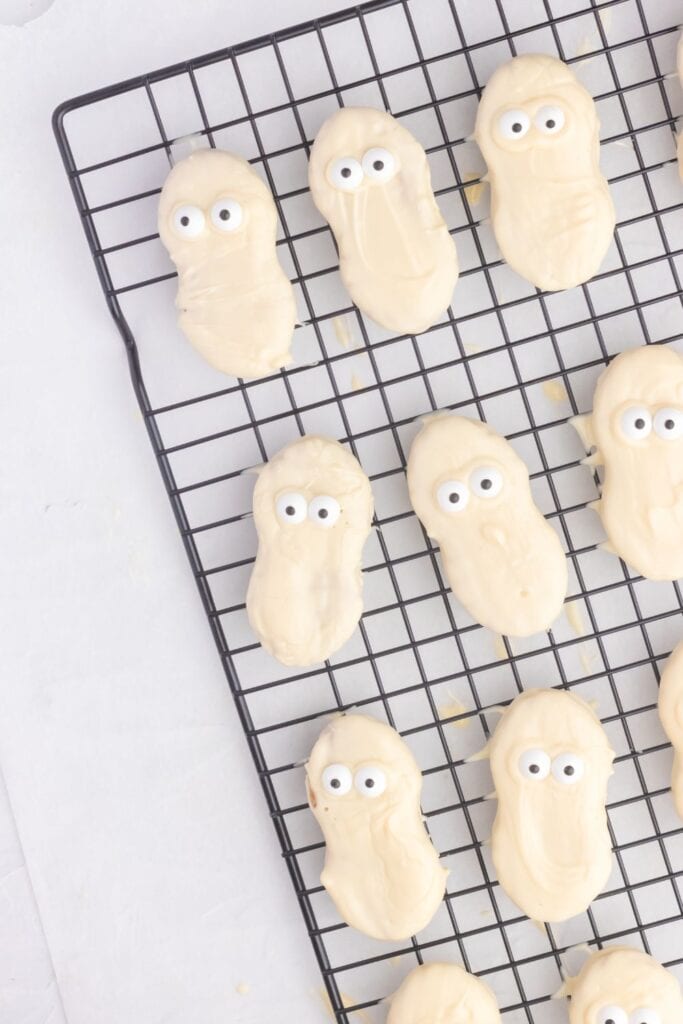
Add two eyeballs to each dipped nutter butter cookie while the coating is still soft, so they will stick.
4. Add the Mummy Bandages
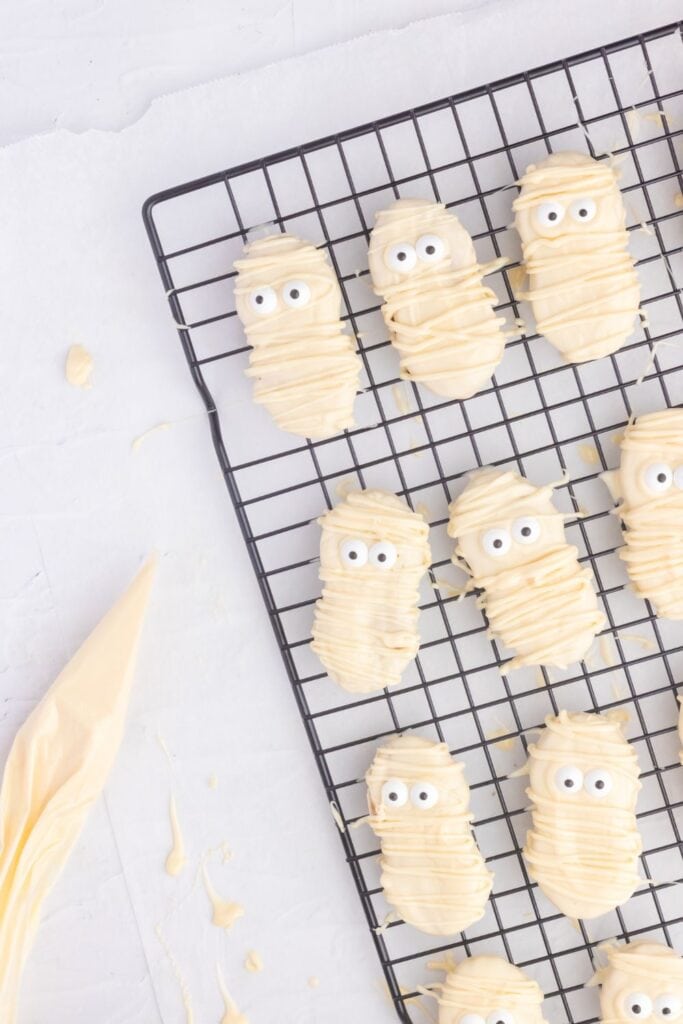
Drizzle extra melted candy melts (or melted white chocolate if you’re using that instead) over the cookies using a piping bag for that boo-tifully bandaged look.
You can also use a ziploc bag with the tip cut out of one corner, or a spoon to drizzle the candy melts if you do not have a piping bag handy.
5. Let the Mummies set
Let the nutter butter mummies set until the candy melts harden, then serve or store.
Storage Tips: You can store the mummy cookies in an airtight container on the counter for up to 4 days.
Tips & Variations
- No piping bag? Use a spoon or fork to zig-zag drizzle the chocolate. Alternatively, you can also use a ziploc bag with the tip cut out of one corner.
- Add a color twist: Add a few drops of food coloring to create green or purple mummies.
- Go nut-free: Use a similar shaped cookie without peanut butter (Vienna Fingers, Oreo cookies, Biscoff cookies or homemade cookies). Just make sure to check the label for allergy-safe manufacturing.
- Create a mummy army: Mix and match cookie types for a whole “mummy crew” with different shapes and sizes, or colors.
- Avoid overheating the candy melts: Candy melts can seize or burn if too hot. Always melt slowly and stir frequently.
- If candy melts are too thick: Add a little shortening (like Crisco) or coconut oil, as this helps smooth out the texture.
Final Thoughts
When you’re in a frightful rush, these quick no bake Halloween desserts will save your ghoul’s night.
From the creepy-cute candy eyes to the white candy melt drizzle, these decorated mummy cookies are just the thing for parties, lunchbox surprises, or cozy movie nights.
Whether you’re feeding a crowd or making a silly snack with your kids, these cute Nutter Butter desserts are guaranteed to disappear, no tricks required.
Nutter Butter Mummies
These Mummy Nutter Butter Cookies are one of my go-to easy cute Halloween party treats. Just grab Nutter Butters, white candy melts, and candy eyeballs and you're good to go. No baking, no fancy tools, just dip, drizzle, and decorate
Ingredients
- 20 Nutter Butter cookies
- 12–15 oz White candy melts
- 40 candy eyeballs
Instructions
1. Melt the candy melts
In a microwave-safe bowl or double boiler, melt the candy melts according to the instructions on the package (see post for tips). Stir until smooth.
2. Dip the cookies
Dip each cookie into the melted candy, gently shaking off the excess. Then place the dipped cookies on a wire rack or parchment-lined baking sheet.
3. Add the eyes
Add two eyeballs to each dipped nutter butter cookie while the coating is still soft, so they will stick.
4. Add the Mummy Bandages
Drizzle extra melted candy melts (or melted white chocolate if you're using that instead) over the cookies using a piping bag for that boo-tifully bandaged look.
You can also use a ziploc bag with the tip cut out of one corner, or a spoon to drizzle the candy melts if you do not have a piping bag handy.
5. Let the Mummies set
Let the nutter butter mummies set until the candy melts harden, then serve or store.
Storage Tips: You can store the mummy cookies in an airtight container on the counter for up to 4 days.
Notes
Tips & Variations
- No piping bag? Use a spoon or fork to zig-zag drizzle the chocolate. Alternatively, you can also use a ziploc bag with the tip cut out of one corner.
- Add a color twist: Add a few drops of food coloring to create green or purple mummies.
- Go nut-free: Use a similar shaped cookie without peanut butter (Vienna Fingers, Oreo cookies, Biscoff cookies or homemade cookies). Just make sure to check the label for allergy-safe manufacturing.
- Create a mummy army: Mix and match cookie types for a whole “mummy crew” with different shapes and sizes, or colors.
- Avoid overheating the candy melts: Candy melts can seize or burn if too hot. Always melt slowly and stir frequently.
- If candy melts are too thick: Add a little shortening (like Crisco) or coconut oil, as this helps smooth out the texture.
Nutrition Information:
Yield: 20 Serving Size: 1Amount Per Serving: Calories: 6965Total Fat: 9gSaturated Fat: 3gTrans Fat: 0gUnsaturated Fat: 2gCholesterol: 33mgSodium: 739mgCarbohydrates: 1719gFiber: 0gSugar: 1097gProtein: 2g
This website provides approximate nutrition information for convenience and as a courtesy only. Nutrition data is gathered from online calculators.